 September 8th
 February 22nd
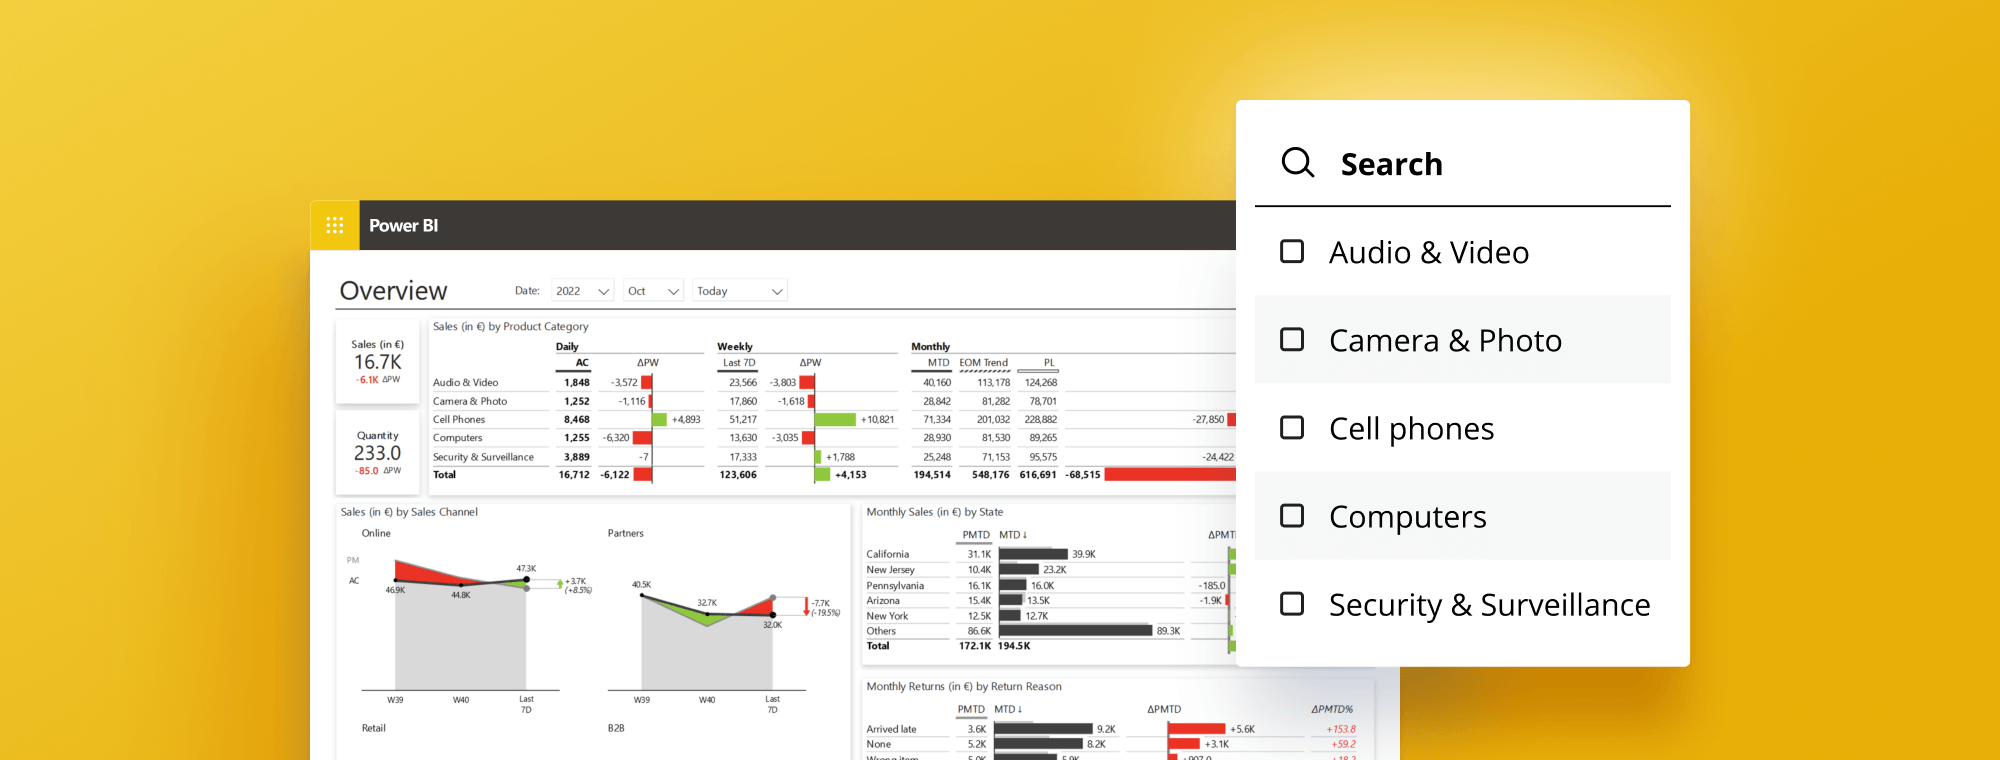
How to Get Search Option in Slicer in Power BI
PRO Trial
As a Power BI user looking to improve your data analysis, you might already be familiar with the Power BI slicer. The slicer, a visual control element in Power BI, allows you to filter data in your reports by selecting one or more values from a list of available options. This feature enhances the customization of your reports, enabling you to focus on the data that interests you the most. However, many users encounter a common question about using a search option in the slicer in Power BI, which further boosts the slicer's functionality. This article will discuss implementing the 'power bi slicer search' option that significantly improves your data filtering process.
Understanding Slicers and Filters in Power BI
Before delving into the main topic, it's essential to comprehend what slicers and filters in Power BI are and how they function. Both tools aim to limit the data displayed in your visualizations, though they do so in slightly different ways.
Slicers, a visual filter, can be added directly to a report page. Their primary purpose is to offer a quick, interactive, and efficient method for filtering data. Slicers are particularly valuable when understanding the relationships between various data points. Unlike traditional filters, slicers enable users to interact with the data dynamically, altering filter criteria 'on the fly.' This interaction fosters a more straightforward exploration of different data facets, aiding users in gaining otherwise potentially missed insights.
Slicer can also be used to elevate your dashboards and reports. Combine them with Zebra BI visuals to improve your reporting. For example, you can easily use a slicer to switch between year-to-date and month-to-date views.
On the other hand, filters are more general and static. They can be applied across an entire report but require manual changes to the filter criteria for data exploration.
Moreover, slicers and filters aren't mutually exclusive - they can be combined for more intricate filtering scenarios. For instance, you might employ a slicer to filter data by region, followed by a filter to display data for a particular time frame. Such combinations facilitate deeper dives into your data, revealing insights that may not be readily apparent.
The Importance of Search Option in Slicer in Power BI
Integrating a search option into your Power BI slicer can elevate your report's user experience. The search functionality allows consumers to quickly locate the data they need, a particularly beneficial feature when dealing with vast data volumes. It's not just about speed, though – the search option also enhances the precision of your analysis, reducing the potential for errors by ensuring the correct data point selection.
Moreover, the slicer's search option paves the way for more precise data filtering. Instead of laboriously scrolling through an extended list of options, users can enter a keyword or phrase to condense their selection. This feature becomes particularly handy when handling complex datasets or pinpointing specific trends or patterns within the data.
In summary, the search option in a Power BI slicer is far from a mere add-on. It is, in fact, a valuable tool that significantly boosts your Power BI report's functionality and user-friendliness.
Step-by-Step Guide to Adding Search Option in Slicer in Power BI
Knowing the value of the search option, it's time to understand how to incorporate it into your Power BI slicer. The process is straightforward and can be executed in a few simple steps:
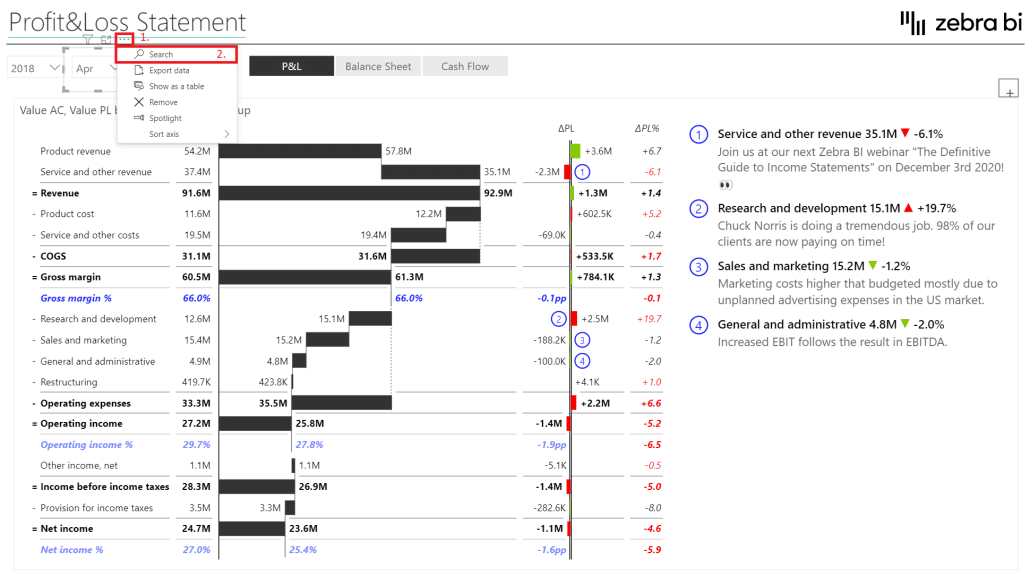
- Select the slicer to which you want to add the search option.
- Click the three dots in the top right corner of the slicer to select “More options”.
- Select the "Search" option. This will enable the search option within the dropdown list on your slicer.
Voila! You now have a search option integrated into your slicer.
This feature allows users to search for specific items within the slicer instead of manually scrolling through a lengthy list, thereby saving time and enhancing report efficiency.
In conclusion, integrating a search option into your slicer is a straightforward yet potent method to augment the functionality of your Power BI report.
Differences Between Traditional Filters and Slicers with Search in Power BI
We've previously mentioned that slicers are a type of filter that can be added to a report page. However, traditional filters and slicers with search in Power BI differ significantly in functionality and user interaction. Slicers offer interactive data filtering with simple clicks, particularly those with a search function. The search feature further enhances this functionality by allowing you to locate specific data points within the slicer, a significant advantage when dealing with large data sets.
Another distinguishing factor is the customization that slicers offer. Unlike traditional filters, slicers can be modified to align with the unique requirements of your report. From changing the slicer's appearance—including size, color, and font—to deciding which fields to include and how they are displayed, slicers allow for impressive adaptability. This high degree of customization means you can create a more personalized, visually engaging report for your audience, effectively boosting your Power BI report's overall impact.
Tips to Improve Your Data Analysis with Power BI Slicer Search
Having learned how to integrate a search option into your slicer, let's look at some tips to help you maximize this feature:
- Use Descriptive Labels: Ensure your slicer has descriptive labels, making it easier for users to find the data they seek.
- Utilize the Search Box: Leverage the search box to locate the necessary data quickly.
- The Clear Button is Your Friend: Don't hesitate to use the clear button to reset your search and start afresh when needed.
- Hierarchical Slicers for Refined Data Selection: Consider utilizing hierarchical slicers to refine your data selection further.
- Sync Your Slicers: A valuable tip is to use the 'sync slicers' feature, allowing you to link multiple slicers and filter your data across various visuals simultaneously. This provides a more comprehensive data view.
Remember, you can customize the search box to match your report's theme and style by altering its size, position, and color. Adhering to these tips can significantly enhance your data analysis and help you fully exploit the slicer search feature in Power BI.
However, when customizing and formatting your report, do not forget about IBCS (International Business Communication Standards). To make it easy on you, you get them out-of-the-box with Zebra BI visuals (Tables, Charts, and Cards) + Microsoft-certified custom visuals for Power BI | Zebra BI.
Navigate through our Sales Dashboard and play around with slicers that affect the dashboard.
You can get more templates here: Report Template Gallery (Excel & Power BI) | Zebra BI.
Common Issues When Adding Search Option in Power BI Slicer and How to Fix Them
While incorporating a search option into your Power BI slicer is typically straightforward, you might occasionally encounter a few common issues. Here's a guide on how to troubleshoot them:
Search Option Not Appearing or Functioning Correctly: You might observe that the search option is not visible or working as expected in your slicer. If this occurs, verify your settings to ensure that the search option is toggled 'On' and that you have customized it according to your preferences. The Microsoft Power BI community forums can also be a valuable resource for advice and support from other users.
Compatibility Issues with Certain Data Types: The search option may not function properly with specific data types, such as a date or time field. In such scenarios, you might need to use a different type of slicer or find a workaround to make the search option compatible with your data.
Performance Impact: Adding a search option to your slicer can potentially slow down the loading and processing times of your Power BI report, especially if you're dealing with a large dataset or a complex report. To alleviate this, consider limiting the number of items in your slicer or employing other filtering options to narrow down the data before utilizing the search function.
Keep these solutions in mind to tackle any obstacles, ensuring a smooth and seamless experience with the slicer search option in Power BI.
Best Practices for Using Search Option in Power BI Slicer
To maximize the utility of the search option in your Power BI slicer, here are some best practices worth noting:
- Utilize Descriptive Labels: Add descriptive labels to your slicer to facilitate easier data identification.
- Filter Data Before Adding the Slicer: This can enhance report performance, making data navigation faster and smoother.
- Explore Various Search Functionality Options: Don't hesitate to experiment with different search functionalities to discover what best suits your specific needs.
Adherence to these practices will ensure you harness the full potential of the search option in your Power BI slicer.
Advanced Techniques for Utilizing Search Option in Power BI Slicer
To elevate your data analysis, consider the following advanced techniques with the search option in your Power BI slicer:
Complex Queries: The search option isn't limited to basic data retrieval. Use it to perform intricate queries that dig deep into your data. For instance, you could search for all cases in which sales in a specific region exceeded a particular threshold during a certain timeframe.
Integration with Visualizations and Filters: The search option can be used with other visual elements and filters to create dynamic, interactive reports. For example, you can link slicer selections to chart elements, allowing users to see visual updates based on their search inputs.
Check out the following Power BI report and switch between YTD and MTD data using the slicer in the top left corner of the report.
Hierarchical Data Exploration: If your slicer includes hierarchical data (like category and subcategory), the search option can be a powerful tool to explore specific levels of the hierarchy quickly.
Mastering these advanced techniques with the search option can empower you to create more insightful, efficient, and interactive reports in Power BI.
The Future of Data Analysis with Enhanced Search Functionality in Power BI
As the field of data analytics progresses, we anticipate seeing continued advancements in search functionalities within Power BI. Future improvements could include more sophisticated search capabilities, such as natural language processing or machine learning techniques, helping users locate the necessary data quickly and intuitively. Such enhancements will make data analysis increasingly efficient and impactful.
In conclusion, incorporating a search option into your Power BI slicer can significantly bolster your data analysis proficiency. By following the steps in this article, applying the recommended best practices, such as IBCS, and taking advantage of our tips, you can effortlessly tailor your reports to display only the required data. Harnessing these techniques will enable you to become a more proficient data analyst, ensuring you stay ahead in this rapidly evolving field.
Create advanced reports in a single visual
Time to impress your audience with clear and insightful reports — created within minutes!